The Fresh Loaf

A Community of Amateur Bakers and Artisan Bread Enthusiasts.

bagels

run4bread's picture

Recommendations for Brooklyn NY?

April 18, 2013 - 10:59am -- run4bread

hi,
I am in Brooklyn for a week (Park Slope and the opposite side the P Park). What are the must try places for bread, bagels and pizza? Levain based preferred.

It was great to come downstairs and find miche from Bread Alone on the counter!

Looks like Amy's and Sullivan Street are only in Manhattan.

Second question: My sisters want to go to Zabars, my grandmother's deli. I see rcommendations for Katz's. How are they similar, different?

Thanks!

Paula

Stuart Borken's picture

Bagels with Diastatic and Non-Diastatic Malt Powder

April 16, 2013 - 1:21pm -- Stuart Borken
Forums: 

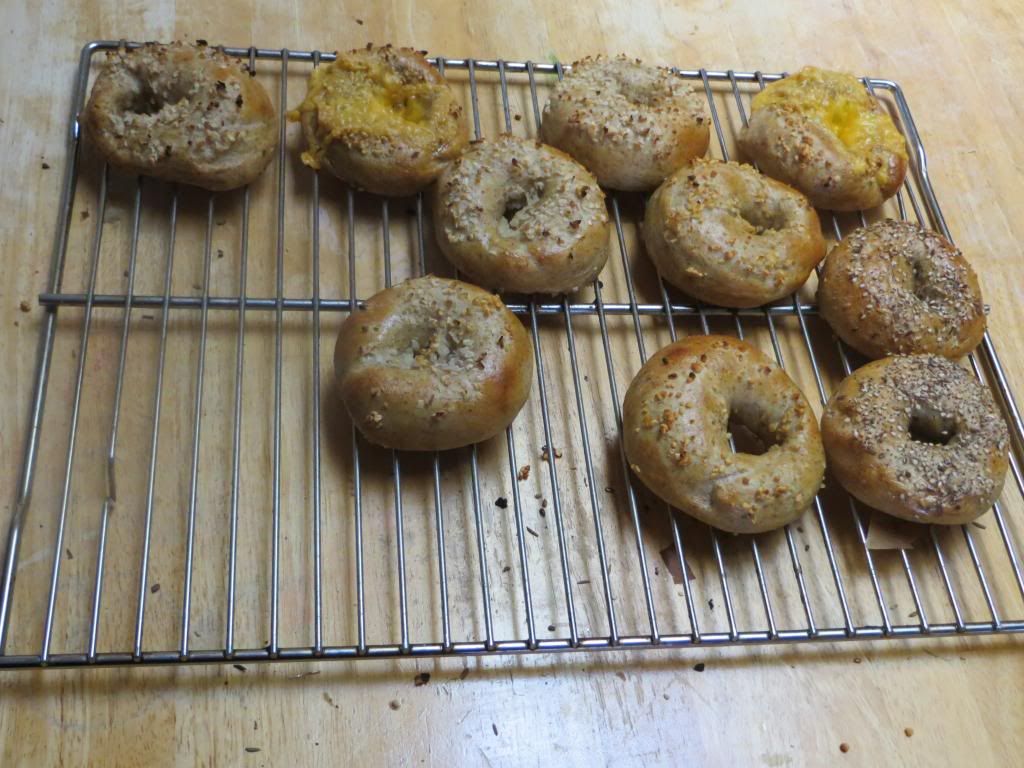
This picture of my bagels has only taken me days of messing with my computer and reading and rereading Varda's instructions on how to put a picture up.  I don't really know if I could put another picture up again.  I contributed the recipe a few days ago before I could put a picture up.  I made sesame, plain, onion and poppy seed.  I did a 10 hour cold retard rise and a 30 second on each side boil in non-diastatic + sugar soln.

dabrownman's picture
dabrownman

The quest for the New Your bagel continues.   This time we lowered the hydration 2% to 56%, used more barley malt, used 27% whole grains (the bulk of which was whole wheat in the dough flour to try to mimic first clear flour) and we used AP with VWG since we didn’t have any bread flour.


We also changed the process around a little bit too.  We built a full strength SD starter out of whole grains, stiffened it up to 65% and then let it sit in the fridge for 3 days to get sour.  Then we built a levain from that using 15 g of seed and whole grain spelt, rye and WW.  We made the yeast waster levain separately and replaced the whole spelt with AP flour.


Once the two levains had doubled, the SD levain was placed into the bottom of the container and the YW levain was put on top of that and they were placed in the fridge together for 2 days.

The levains were removed from the fridge to warm up.  While they warming we autolysed the rest of the ingredients, including; the salt, malts and VWG for 2 hours after having kneaded them together.  Dough like this would kill the KA so hand kneading is always the wiser choice but a hard slog.

After the levains hit the autolyse it took a while to work then in the hard dough by squeezing it through the fingers.  Then we kneaded the dough until it was tough but silky smooth.  After a 1 hour rest we shaped the bagels around the knuckles at 135 g each and put them on semolina dusted parchment where they rested for 1hour before gong into the fridge for a 32 hour retard.


Sorry, cut into one for a taste while they were still quite warm.

After coming out of the fridge, we let the bagels proof on the counter for 4 hours.  The bagels doubled over that time and then we refrigerated them again for 1 ½ hours to stiffen them up.  Next time we will put them back in the fridge after 3 hours and let them cool for 2.  The bagels were gently boiled for 30 seconds each side, in water that had barley malt and baking soda in it, just to shock them awake. 


Bagel hole?  Made a little dough ball for floating to see if the bagels were ready to boil and that they too would float!

They were flipped on a kitchen towel to get rid of the excess water and then dunked into the seed mixture.  The 3 mixes this time were white, brown and black poppy, white and black sesame and a multi-seed and salt one comprised of the previous seeds plus oregano and basil seeds, black and brown caraway seeds, nigella seeds and kosher salt.  We made twice as many of the combo salt ones since they are our favorite.


Looks and cuts better when fully cooled,

The steam was supplied by 1 of Sylvia’s steaming pans and a 12” skillet with lava rocks and we used both stones to accommodate the 13 bagels and 1 small roll.   They baked with steam at 450 F for 8 minutes and then steam was removed and they baked for another 8 minutes at 425 F convection until they were deemed done and nicely browned.

Beautiful skies don't have to be sunsets or sunrises.  The sunset was great too!

After deflating in the boil they managed to puff themselves back up nicely in the steam.  These are getting very close to NY SD Bagels and would be way sourer without the YW in the mix to tone it down.  The blistered crust is crispy, the crumb chewy but the taste is near spot on too.  Even my wife is having one for breakfast today instead of Einstein’s.  Now that takes some doing.  We like this batch very much but will make some changes next time as we always do still searching for the perfect bagel that doesn’t exist.

I never eat two bagels at once but did when they came out of the oven yesterday - yummy!  Cream cheese schmear and buttered with minneola marmalade.

Formula

SD Starter

Build 1

%

SD Desem & Rye Sour

15

1.34%

Spelt

18

1.80%

Whole Wheat

30

3.00%

Dark Rye

30

3.00%

Water

60

6.00%

Total Starter

153

12.90%


YW Starter

Build 1

%

Yeast Water

58

5.80%

AP

18

1.80%

WW

18

1.80%

Dark Rye

18

1.80%

Total

112

11.20%


Starters


%

Flour

115.5

11.55%

Water

125.5

12.55%

Hydration

108.66%


Levain % of Total

13.22%


Dough Flour


%

Whole Wheat

200

20.00%

AP

800

80.00%

Dough Flour

1,000

100.00%


Salt

18

1.80%

Water

500

50.00%

Dough Hydration

50.00%


Total Flour

1,115.5


Water

625.5


T. Dough Hydration

56.07%


Whole Grain %

27.57%


Hydration w/ Adds

56.27%


Total Weight

1,823


Add - Ins


%

Red Rye Malt

5

0.50%

White Rye Malt

5

0.50%

VW Gluten

18

1.80%

Barley Malt

36

3.60%

Total

64

6.40%


mrgnlit's picture

adjust peter reinhearts pumpernickel bagels recipe for mini bagels

February 24, 2013 - 10:31am -- mrgnlit
Forums: 

So I am in a quest to make bite sized bagels but I have some questions about the baking time The original recipe makes 6-7 bagels at 4.5 oz each and bakes at 450 oven (lowered from 500 just before baking) for 25-30 minutes. How small can I get away with here? I was thinking I. The ballpark of 16-20? Maybe more?

Also if I want to do this how much should I adjust the baking time/temperature 

How much will this impact the moisture of the end product also? I know making things smaller can dry them out but I'm hoping with the adjustments they will not be bricks.

JMonkey's picture
JMonkey

I bake bread about twice a week for my family, and these days, it's usually either a sourdough from 50% whole wheat, 10% rye and 40% AP or a loaf of Buttermilk and Honey Whole Wheat. But for whatever reason, I was craving rye yesterday, so I set up this loaf. No caraway, as I'd run out, though i do like it.

Here's how I made it:

Formula

  • Whole Rye: 40%
  • High-Gluten Flour: 60%
  • Water: 75%
  • Salt: 1.8%
  • All the rye is in the starter with a hydration of 100%


Ingredients

  • Whole rye starter, 100% hydration: 400g
  • High gluten flour: 300g
  • Water: 175g
  • Salt: 9g
  • Optional -- 9g of caraway seed

To make the bread, mix up all the ingredients and knead. It's sticky, so I like to let it sit for 10-15 minutes first, then I knead with wet hands for 3-5 minutes, let it sit again for 5 minutes, and do a final couple minutes of kneading. Let it rise for 2.5 to 3 hours, shape, and give it another 2.5 to 3 hours to finish. I baked mine in a cloche at 450, covered for 35 minutes, uncovered for 10.

For this morning's breakfast, Iris (my 9-year-old) desperately wanted bagels, so I said I'd make them, but I only had rye starter ready to go. Could be interesting, I thought. So I plowed ahead. They turned out well!

Forumla

  • Whole Rye: 16%
  • High gluten flour: 84%
  • Water: 59%
  • Salt: 2%
  • Diastatic malt powder: 1%
  • All the rye was in the starter at 100% hydration

Ingredients

  • Rye Starter at 100% hydration: 285g
  • High gluten flour: 735g
  • Water: 375g
  • Salt: 18g
  • Diastatic malt powder

Here's how I made them. The night before, I mixed up all the ingredients until they were mostly hydrated, and then let them sit for 15-20 minutes. I then kneaded for about 5 minutes, let it sit for another 5 minutes, and gave it a final kneading of 2-3 minutes. I then cut the dough into 12 pieces of 110 - 120g each.

I pre-shaped each piece into a ball and then rolled them out into a snake, which I wrapped around my hand, sealing the ends together with the heel of my palm. They proofed overnight, covered, in my garage, which is unheated, but rarely gets below 45 degrees F.

The next morning, I brought a big pot of water to boil, to which I'd added a good handful of baking soda. Does it make a difference? Who knows? But I know I'm not messing around with food-grade lye, and baking soda is cheap. Why not? Anyway, it was apparently very cold last night. Usually, I boil them for a minute on each side, and they typically float after 30 seconds or so. These didn't float until 1:45 had passed! Anyway, I put them on a piece of parchment paper that I'd placed on my peel, and let them cool down a bit before brushing them with an egg wash (1 egg + a tsp or two of water, lightly beaten). I like the color it gives them, and it makes the toppings stick better. For toppings, I like garlic, onion, a salt & seed mix, and cheese. For the garlic and onion, I've found that what works best is to rehydrate dehydrated onion and garlic with hot water. Fresh just burns to a crisp in the oven. I add cheese halfway through the bake. Cheese on top of some garlic is particularly nice. I baked at 500 degrees F on a pre-heated baking stone for 10-12 minutes, turning once halfway through the bake.

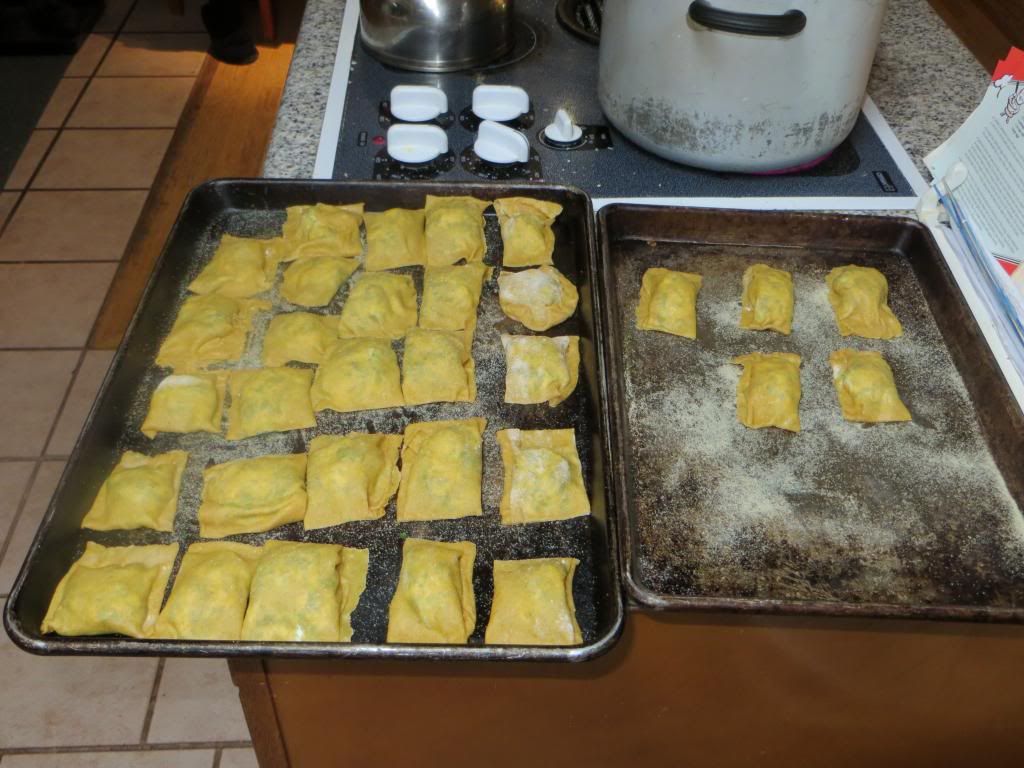
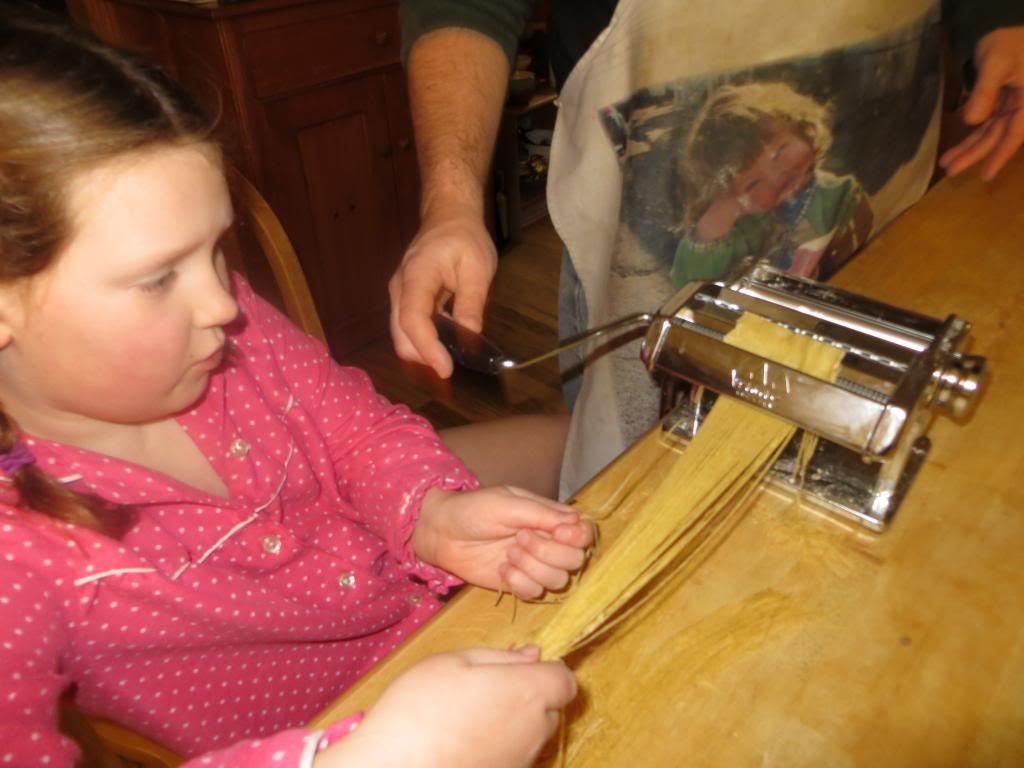
Finally, my daughter and I have had a lot of fun with the pasta machine we got for Christmas from my parents. Last night, we made spinach and cheese raviolis, which were a ton of fun to make, and even more fun to eat.

I sauteed them in some brown butter after they boiled and then topped with grated parmesan. Just delicious. Here's Iris and me turning the scraps into noodles. They went into the freezer and will likely be added to a soup sometime soon.

Happy New Year, fellow bakers!

dabrownman's picture
dabrownman

We made these the same way as always but these I would have to call a failure compared to: 15% Whole Wheat Bagels with YW and SD Desem Combo Starter   Use that post for the method with the changes listed below.


We had about twice the whole grains this time, and all the whole grains were in levain last time and this time all the whole grains were in dough flours.  Half the white flour was bread flour last time and this time it was all AP.  We build the YW and SD levains separately last time and this time we built them together.


The hydration was the same but the temperature in the kitchen was 20 degrees cooler this time.  Last time the retard was 20 hours and this time it was only 10.  Lat time we let the dough develop 2 hours before forming and 1 hour after forming. This time we let the dough develop for 1 hour before forming and 2 hours after forming.


Last time the bagels doubled in volume but this time they did not.  They floated immediately when they hit the water last time and this time they never ever floated. Last time the bagels were near perfection this time they are hardly worth eating.  They aren’t terrible but comparatively its like night and day.


It just goes to show you that you need to watch the dough and not the clock and dowhat it tells you to do.  The main problem was the temperature.  It’s not August the 7th here when the kitchen was 84-86 F.  It’s the end of December and the kitchen is64 F.  Things now take at least 3 times longer and my apprentice should have known better!


The bagels should have never gone in the fridge at all and left to double on the counter no matter how long it took and then refrigerated for an hour or two before hitting the hot water.   The extra whole grains also required more water in the mix at least 2 to 3% more hydration wise.

Te best thing about them is the taste but even that is not what it should be.  Toady Tom’s Tasty Toasted Tidbits did their part taste wise.  The crust was crisp but no big bubbles the mini oven and shlvia’s steam is noted for putting on crusts of all kinds.  The crumb never opened as it should have and as YW does regularly so it was denser than we were shooting for and expecting.

This happens every time you don’t let the dough develop properly and rise as it should when it is cold.  Patience comes to those who wait and it takes a lot of it in the winter time.

Thank goodness we won’t end the year on this bake and still have a shot at one of Michael Wilson’s panattone’s

I forgot to put the 15 g of Barley Malt Syrup in the add in secion in the formula below - Donit for get it!

Formula


Mixed Starter

Build 1

Build 2

Total

%

SD Starter

10


10

1.94%

AP

25

25

50

11.49%

Yeast Water

25


25

5.75%

Bread Flour

25


25

5.75%

Water

50


50

11.49%

Total Starter

135

25

135

31.03%


Starter


Hydration

100.00%


Levain % of Total

18.93%


Dough Flour


%


Spelt

22

5.06%


WW

22

5.06%


Dark Rye

22

5.06%


Toady Tom's Toasted   Tidbits

22

5.06%


Red Malt

3

0.69%


White Malt

3

0.69%


Kamut

22

5.06%


Potato Flakes

22

5.06%


Oat Flour

22

5.06%


AP

275

63.22%


Dough Flour

435

100.00%


Salt

10

2.30%


Water

215

49.43%


Dough Hydration

49.43%


Total Flour

515


Water

295


Total Dough Hydration

57.28%


Hydration w/ Adds

58.74%


Total Weight

845

106

grams ea @ 7


Whole Grains

27.77%


Add - Ins


%


Ground Flax Seeds

10

2.30%


Total

25

5.75%


winstonsmith's picture
winstonsmith

A couple months ago I was using my KA Pro 6 of a dozen or so years of age when it finally stripped a gear. I ordered parts and repaired it, but as I thought about it I realized that it no longer suited my needs. I expect it will last another decade or more, but it will be reserved for light loads.

The bagel formula I have been using is from Jeff Hamelman and I like it quite a lot. This time I decided to try the BBA, or at least a somewhat modified version. That makes a bakers dozen, which would have been too much for the KA since I use HG flour. Fortunately, I have a new Bosch Universal! I decided to double the recipe and see how the new machine worked.

I want to say right now that this post is not about a KA vs. whatever. The KA is a fine machine for many purposes, but it was never intended to make 26 large bagels worth of high gluten dough at once. Consequently any comparison between the two is irrelevant. Use what you have within its limits and if you move beyond it do so and remember the good things you've made rather than bemoan what you could not do. My 2 cents. 

Onward!

I followed the BBA formula as I've said, creating the sponge in the mixing bowl. Once it sufficiently proofed I added part of the flour to collapse the sponge. I've read that getting dough into the center column could be a problem so I incorporated the ingredients in two batches, mixing half the flour in for a few moments then in with the rest. In doing so I had no problems later.

One concern was that I wasn't sure just how long I should mix the ingredients. This was an untried formula in an unfamiliar machine. I decided that I would let it knead for 5 minutes and try to windowpane test it every minute thereafter. I found that 8 minutes provided sufficient time. I could have gone a little longer, but I don't like to over-oxidize. 

Please forgive the low quality cell phone pics. 

Here's the Beast with its first "victim" 


This may not look like much, but it's roughly 7 lbs of high gluten bagel dough which ultimately made 26 bagels of about 4&1/4 ounces each. That would have been impossible before, but the Bosch acted like it didn't care at all. 


I went back and forth on Hamelman or Reinhart and ultimately the latter won simply because I wanted to try it. That said I didn't depart entirely from my old ways and  follow everything to the letter. 

What follows is my standard work practice for bagels. 

I use an apartment sized fridge for retarding dough and I pre-cut sheets of parchment to fit the shelves. I then spray them lightly with Pam and rub it into the paper. I then  cut the number of portions from the dough ball which will fit onto the sheet and roll them into ropes and form the bagel. Onto the sheet they go and into the fridge after covering with plastic wrap. Once that's all done I let them sit for about 15 hours until the next morning.

I preset the oven to go off an hour before I woke set to 500F. The bottom two racks have rectangular stones and the top one has a large aluminum flat sheet. 

When I get up I take another set of parchment sheets sized to fit the stone and spray as before to avoid sticking.  I don a pair of surgical gloves and add three teaspoonfuls of lye to three quarts of cold water in a stainless pan. Note cold water. The reason the reason for that is lye will react strongly with water, and if the water is hot it could go everywhere, including yourself. Cold is definately the safe way to go.

There's a thread explaining the use of lye with bagels. Coincidentally it turns out the fellow who does this shares my profession and we both grew up in Philly. Small world, eh?

Once the water gets up to a boil I put 4 bagels in and flip them over at about 30 seconds for a total of a minute them remove them. One side of the bagel is flatter than the other and what I do is put whatever topping I want on the more curved surface and have that side down on the parchment. I then carefully take the hot sheet out of the oven and quickly slide parchment and all onto it. The reason being is that I want both sides to bake a bit, but not completely set. The hot sheet holds enough heat to start the process without burning the toppings and the flat side being exposed to the open oven has a chance to rise and round itself. I then use tongs and slide the parchment and bagels onto another flat sheet, close the oven and quickly flip them over. Back into the oven onto one of the stones. I'll repeat the process of boiling and topping on another parchment paper and repeat, then put that onto the other stone. Total baking time is about 22 minutes at 500F. With the oven opening and closing I doubt the oven stays quite that hot for the second batch so I may give another minute or two if needed. 26 bagels required three batches on the size stones I have and here's the results, minus several. 
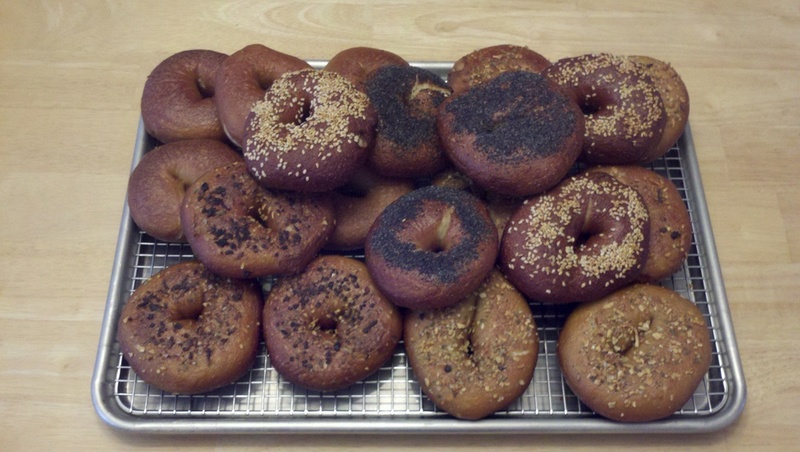


I took some with me to work that morning and they were well received. They were nice and chewey with a light crunch when bitten into. I will have to try Hamelman again with the Bosch to compare the results between it and the Pro 6. There was better development of gluten this time, but there are too many variables to know why.

As far as the machine itself, I'm thrilled with it. I would have to do this in three or four batches and the time involved would have been prohibitive. I believe I could have done perhaps three dozen, but this is about the perfect quantity. 

Pages

Subscribe to RSS - bagels